Azure Local - Homelab - Part 4 - Configuration pre-requisites for deployment with local identities and KeyVault
- Intro
- Networking
- Prepare processor for nested virtualization
- Prepare for VLAN trunking
- Create Azure Local virtual machines in Hyper-V
- Prepare subscription in Azure
- Register nodes to Azure Arc
- Allow PSRemoting
- External DNS
Intro
This is part of a series about my new 2026 homelab. I encourage you to read part 1, where I describe some of my design decisions. In this blog post I tell about my initial configuration and what I had to configure before Azure Local deployment was successful. This post will not outline how I deployed Azure Local on the virtual system, only all pre-requisites I had to go through to get Azure Local to deploy. In next post I will write about my configuration in the Azure Local deployment wizard.
In this article, I have deleted my previous Azure Local homelab that was configured with Active Directory, and deployed a new Azure Local stack using, the Local Identities with Azure KeyVault method that was released in General Availability in version 2604.
Reference from Microsoft Learn: Deploy a virtual Azure Local system
I wrote about how I installed the physical Hyper-V server that I use as foundation for my lab. Therefore I will not outline that in this article. Read part 2 to understand how I prepared the Hyper-V server that my Azure Local nodes are running on.
Networking
Even through I did not chose to purchase hardware that supported using multiple physical nodes and do the proper networking on the physical layer, networking is still a crucial part of the underlying configuration of Azure Local.
This time I went for a configuration where we have 2 intents:
- Combined Management & Complete
- Storage
Configure networking in Hyper-V
Management and Compute:
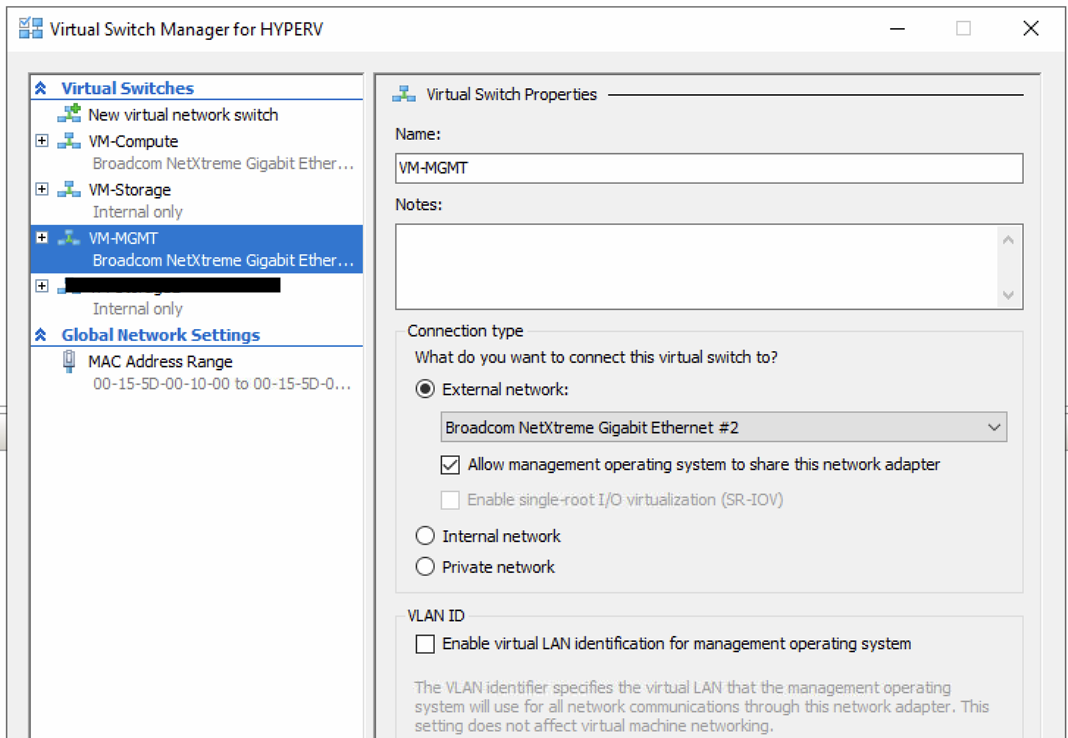
For Management and Compute I created an external VM Switch and allowed it the operating system to share that network adapter.
(The picture shows more VMSwitches than needed - they exist from an older deployment. I use the Management VMSwitch in from the physical server, as the switch for the compute/management intent)
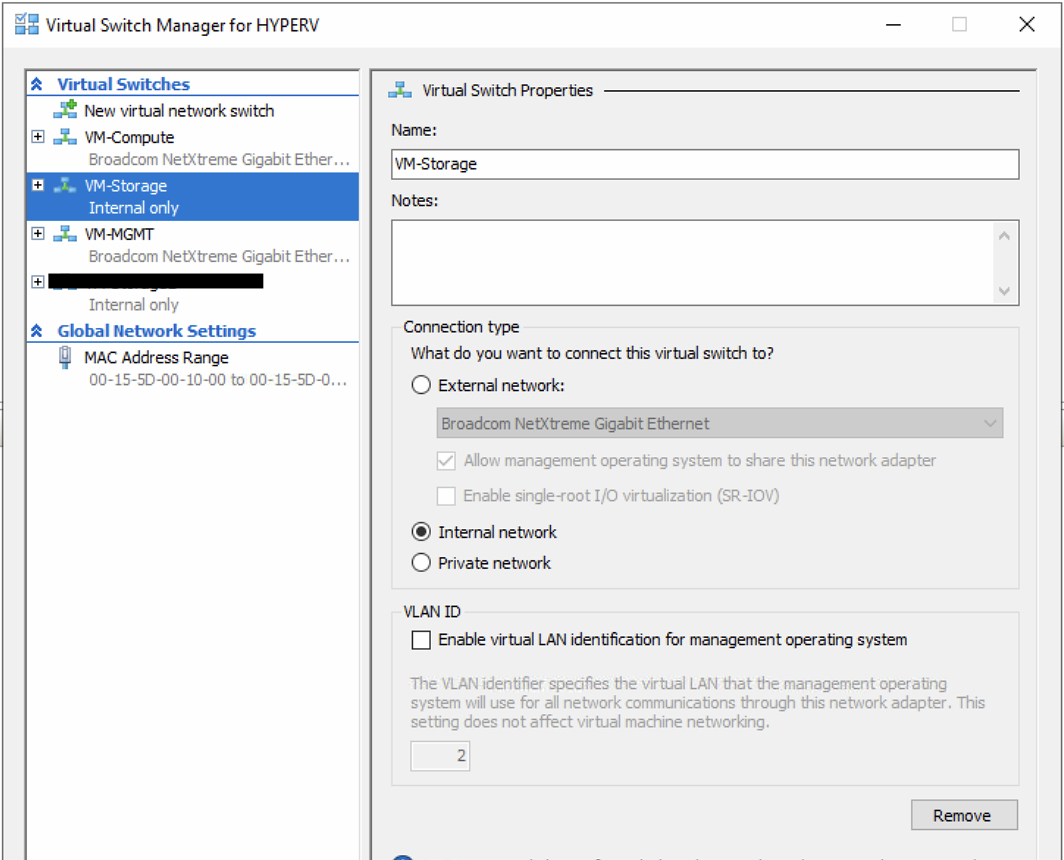
Storage:
For Storage I created an internal VM Switch. Storage should never communicate outside the stack, not in prod or demos.
Prepare networking for Azure Local nested virtualization
Even through the Microsoft Learn article mentions it, I was under the impression that I only needed to prepare for nesting, once the Azure Local stack was deployed. However, I discovered that doing the pre-installation validation of Azure Local, it creates a test VM switch and tries to communicate the DNS server for each of the 6 infrastructure IPs that we give the Azure Local deployment wizard (We have not covered Azure Local installation yet).
So long story short, just use these commands now before installing Azure Local, and safe yourself a huge pain trying to figure out why pre-deployment wizards fails because it cannot do DNS resolution on the 6 infrastructure IP addresses.
Set-VMNetworkAdapter -VMName azhci01 -MacAddressSpoofing On
Set-VMNetworkAdapter -VMName azhci02 -MacAddressSpoofing On
Prepare processor for nested virtualization
Runs these commands:
Set-VMProcessor -VMName azhci01 -ExposeVirtualizationExtensions $true
Set-VMProcessor -VMName azhci02 -ExposeVirtualizationExtensions $true
Prepare for VLAN trunking
Run these commands:
Set-VMNetworkAdapterVlan -VMName "azhci01" -Trunk -AllowedVlanIdList "711,712" -NativeVlanId 0
Set-VMNetworkAdapterVlan -VMName "azhci02" -Trunk -AllowedVlanIdList "711,712" -NativeVlanId 0
Create Azure Local virtual machines in Hyper-V
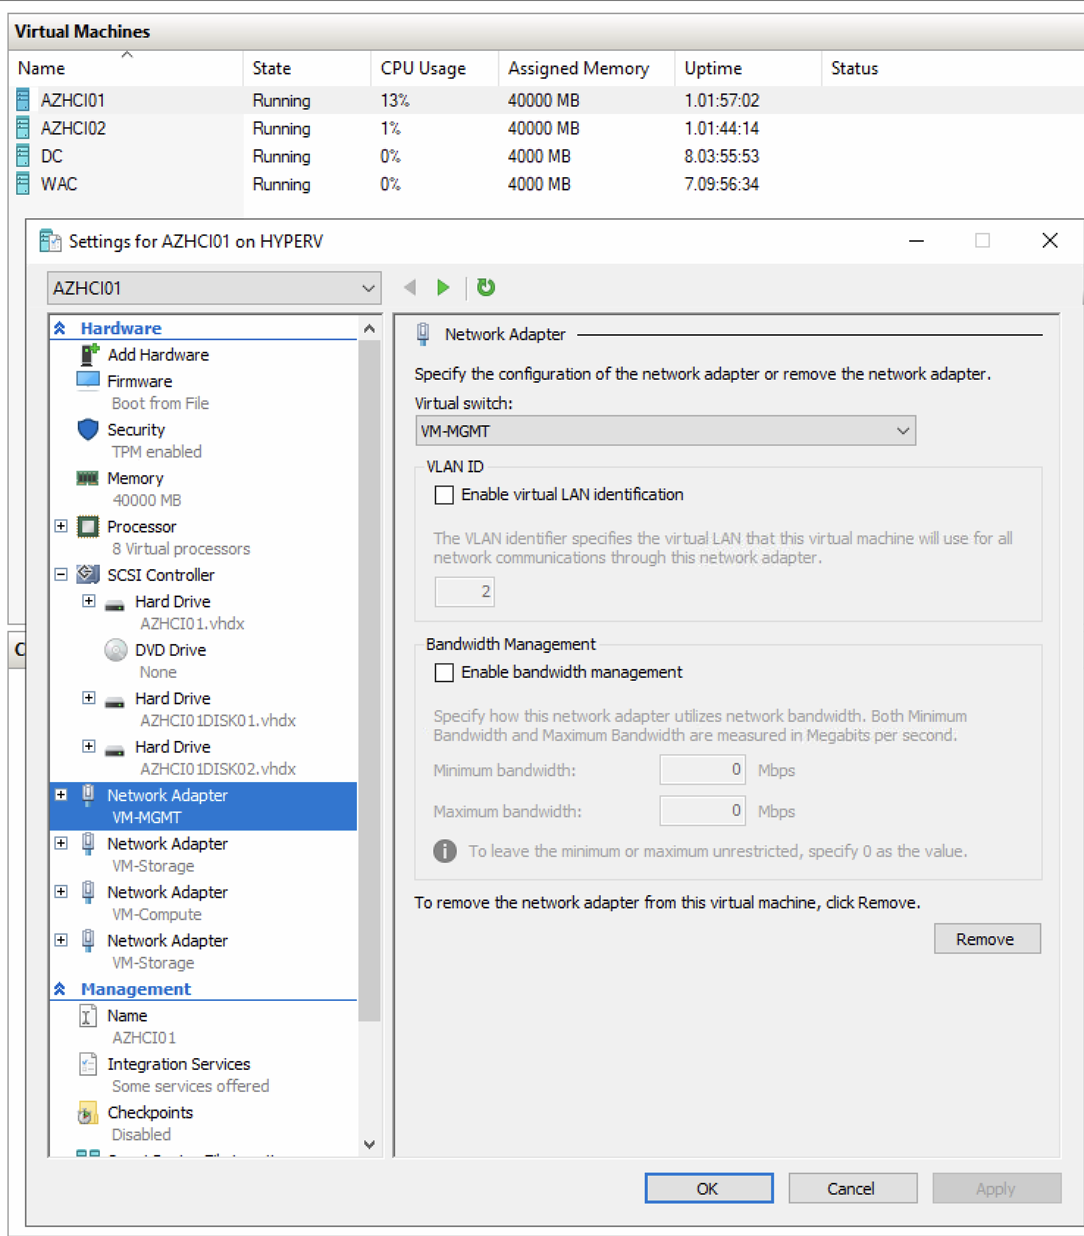
All requirements on the physical site of the deployment is now done, and it is time to create 2 virtual Azure Local nodes. Here is what I did:
- Created 2 identical VMs
- Each with 8 vCPU
- 40 GB RAM per node
- 1 management/compute and 2 storage network adapters per node
- vTPM enabled (and secure boot enabled)
- Mounted ISO with Azure Local installer
- Installed Azure Local on each node
HINT: DO NOT run Windows update on the virtual azure local nodes after installing.
HINT: The only settings you should configure at this point is:
- IP address and DNS server
- Hostname update
Prepare subscription in Azure
Register required resource providers
Use these command to register all required resource providers on the subscription you have chosen for your Azure Local deployment:
Register-AzResourceProvider -ProviderNamespace "Microsoft.HybridCompute"
Register-AzResourceProvider -ProviderNamespace "Microsoft.GuestConfiguration"
Register-AzResourceProvider -ProviderNamespace "Microsoft.HybridConnectivity"
Register-AzResourceProvider -ProviderNamespace "Microsoft.AzureStackHCI"
Register-AzResourceProvider -ProviderNamespace "Microsoft.Kubernetes"
Register-AzResourceProvider -ProviderNamespace "Microsoft.KubernetesConfiguration"
Register-AzResourceProvider -ProviderNamespace "Microsoft.ExtendedLocation"
Register-AzResourceProvider -ProviderNamespace "Microsoft.ResourceConnector"
Register-AzResourceProvider -ProviderNamespace "Microsoft.HybridContainerService"
Register-AzResourceProvider -ProviderNamespace "Microsoft.Attestation"
Register-AzResourceProvider -ProviderNamespace "Microsoft.Storage"
Register-AzResourceProvider -ProviderNamespace "Microsoft.Insights"
Create resource group and configure permissions
Refer this article for permissions. I advise to read the post carefully and perform each outlined step, because every part of permissions configuration is vital for a successful deployment at first attempt.
Assign required permissions for Azure Local deployment | Microsoft Learn
Register nodes to Azure Arc
Note that we have not done anything to the virtual Azure Local nodes, other than setting IP/DNS and hostname. Now we must register them to Azure Arc which is the last step before we are ready for Azure Local deployment.
Use this PowerShell script on each node:
#Define the tenant you will use to register your machine as Arc device
$Tenant = "<INSERT-YOUR-TENANTID-HERE>"

#Define the subscription where you want to register your machine as Arc device
$Subscription = "<INSERT-YOUR-SUBID-HERE>"

#Define the resource group where you want to register your machine as Arc device
$RG = "rg-lz-online-azlocal-weu-01"

#Define the region to use to register your server as Arc device
#Do not use spaces or capital letters when defining region
$Region = "westeurope"

Connect-azaccount -UseDeviceAuthentication -Tenant $Tenant -SubscriptionId $Subscription

#Invoke the registration script. Use a supported region.
Invoke-AzStackHciArcInitialization -TenantId $Tenant -SubscriptionID $Subscription -ResourceGroup $RG -Region $Region -Cloud "AzureCloud"
Allow PSRemoting
Deployment will fail if we do not ensure nodes can communicate. Use these commands on each node:
Enable-PSRemoting -Force
Set-Item WSMan:\localhost\Client\TrustedHosts -Value "IPOfOtherNode:x.x.x.x"
External DNS
Even though we do not have any Active Directory in this configuration, we still need a DNS server. On this DNS server, create an A record for each of the Azure Local nodes like:
- AZHCI01 > 192.168.0.10
- AZHCI02 > 192.168.0.11
- azhcickj4 > 192.168.0.230 (cluster object)
The cluster object is the first of the 6 IP addresses that you allocate to Azure Local infrastructure. The name of that DNS A record must be the name of the Azure Local stack Instance.
Have feedback on this post?
Send me a message and I'll get back to you.