Azure Local – IaC – AVD – Azure DevOps – Configuring the first pipeline file
- Intro
- Clone repo to local VS Code
- Create your .yml file
- Parameters
- Stages
- Pool
- Jobs and tasks
- DevOps PAT
- PowerShell 7
- Inputs
- Push file to main branch
- Create pipeline in Azure DevOps
- Test the pipeline
This article is part of a serie. You can navigate to the main page using this link:
Intro
This guide walks you through how to configure an Azure DevOps Build Pipeline including:
- Clone your DevOps repo to local VS Code
- Create your .yml file
- Modify the content of the file
- Push to main branch in remote repo
- Create pipeline in portal
- Test pipeline execution
Clone repo to local VS Code
There will be many guides on the internet on how to clone a repo from Azure DevOps to local installed VS code, so I will not go into much detail about this. But you need to have installed VS Code: https://code.visualstudio.com/ and have access to the DevOps project that holds the repo you will be working on. You will need contributor permissions and if your organisation uses branch policies, you may have to know about checking out a branch, comiting to the branch, push changes, create pull request and merge to main. If your organization uses branch policies, I would assume that there is some internal guides for you to follow here.
Go to the Repo in DevOps and find the “Clone” botton in the top right corner:
Then Select “Clone in VS Code”:
If prompted, type in your credentials that authenticates towards the Azure DevOps project.
Select a folder to save the repo to on your local drive. I recommend creating a root folder with a name that matches the DevOps organization, because the folder for the Repo will get its name automatically within that root folder. The root folder MUST NOT be within OneDrive or other syncing software.
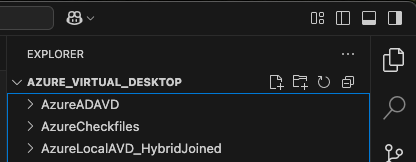
Now you have the folder in VS Code:
You can go to File > Add Folder to WorkSpace
This will allow you to save the folder to a workspace that can be opened by VS Code. This is an easy way of allowing VS Code to open the repo and potential a whole list of other repos from the same DevOps organisation.
Create your .yml file
You can create a .pipeline folder in the root of your repo folder. This .pipeline folder will hold all your .yml files that is the pipeline files.
Next, go ahead and create your .yml file in the .pipeline folder. Below is an example of a .yml file I will try to expain further below:
parameters:
- name: HostPoolName
  displayName: HostPoolName
  type: string
  default: 'avdpool'
- name: RG
  displayName: ResourceGroupName
  type: string
  default: 'rg-avd'

stages:
- stage: Reboot
  jobs:
  - job:
    displayName: "Call pipeline to Start reboot of session host reboot"
    pool:
      vmImage: 'windows-latest'
    timeoutInMinutes: 30
    steps:
    - checkout: self
    - task: AzureKeyVault@2
      inputs:
        azureSubscription: 'Management'
        KeyVaultName: 'kv-devops'
        SecretsFilter: 'DEVOPSPAT'
        RunAsPreJob: false
    - task: AzurePowerShell@5
      displayName: "Call pipeline to Start reboot of session host reboot"
      timeoutInMinutes: 30
      env:
        HostPoolName: ${{ parameters.HostPoolName }}
        RG: ${{ parameters.RG }}
        DEVOPSPAT: $(DEVOPSPAT)
      inputs:
        ConnectedServiceNameARM: 'Management'
        ScriptPath: 'RebootAVDSessionHost/Call_RebootAVDSessionHost_AzureLocal.ps1'
        TargetAzurePs: LatestVersion
        pwsh: true
trigger: none
Parameters
The first part of the .yml file is parameters. This section is used when we want to allow default values that should be parsed to the script. Users running the pipeline can override the default values with other input values when running the pipeline.
Parameters must be parced directly to each task like this:
env:
HostPoolName: ${{ parameters.HostPoolName }}
Stages
I like to divide my pipeline into stages. That way I can run certain parts of the pipeline and leave out others. Useful for testing and debugging. In this example I only have one stage. To add more stages, simple create another instance of stage below or above the current stage.
Pool
pool:
vmImage: ‘windows-latest’
This refers to either default pools hosted by Microsoft or self-hosted agent pools. In my example I just use default pool hosted by Microsoft (Azure Pipelines).
To add pools, go to Azure DevOps > Project Settings > Agent Pools.
This is useful if you need to run many pipelines or have specific requirements for loaded modules and software on the pool agents.
Jobs and tasks
You can have multiple tasks within a job and multiple jobs within a stage. It all depends on how you need your deployment to run. Just remember that each job will trigger a new call to a pipeline agent, so if you need one task to work together with another task, keep them within the same job (or you can start working with global output parameters).
DevOps PAT
In my example I have DevOpsPAT. This is a Personal Access Token I can generate in Azure DevOps and assign certain permissions. This is useful when I want to run a PowerShell script that calls another pipeline in DevOps. I will get around this in another post.
PowerShell 7
pwsh: true means that we run PowerShell 7 even though the task is called AzurePowerShell@5
Inputs
inputs:
ConnectedServiceNameARM: ‘Management’
ScriptPath: ‘RebootAVDSessionHost/Call_RebootAVDSessionHost_AzureLocal.ps1’
Above is the required inputs to execute a certain script within a task.
ConnectedServiceNameARM should match the name of the Service Connection in Azure DevOps.
Push file to main branch
Once you are done editing your .yml file in the local repo, you can go ahead and commit the changes and push to main. You will need to write a commit statement. Here you can write a small text about your changes to the repo.

Create pipeline in Azure DevOps
- In Azure DevOps, go to Pipelines and then select New Pipeline in the top right corner
- Select Azure Repos Git
- Select your repo and then select Existing Azure Pipelines YAML file
- Locate the .yml file and select Continue
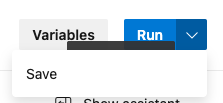
- Press the down-arrow and select save
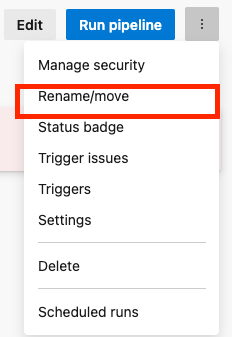
Note that after creating the pipeline, it will have a default name, so you have to locate the pipeline under “All”. Select the pipeline. Select the 3 dots and then rename the pipeline.
Test the pipeline
Now you are ready to test the pipeline. Just find the pipeline in Azure DevOps. Then hit Run pipeline, change input parameters if needed and execute. You can then monitor execution in real time.
Have feedback on this post?
Send me a message and I'll get back to you.