
Azure Local - WDAC - Part 3 - Update and version supplemental policies safely
- Intro
- Why versioning matters
- When to update a supplemental policy
- Check what policies are currently active
- Switch to audit mode
- Update or reinstall the software
- Keep a version history
- Rebuild the supplemental policy from the updated software
- Increment the version and keep the same PolicyID
- Redeploy the updated policy
- Return to enforced mode and validate
- Final remark
Intro
This article is part of a series: Navigate to series page
Once supplemental WDAC policies are in place on Azure Local, the day will come when software is updated, replaced, or moved to a different path. When that happens, the existing supplemental policy is no longer correct — new binaries with different hashes or publisher attributes will not match the old allow rules.
In this article I will walk through how to safely update and re-version an existing supplemental policy so it reflects the updated software, without leaving the cluster in a broken or unprotected state.
Why versioning matters
WDAC supplemental policies are identified by a PolicyID and a PolicyVersion. When you redeploy an updated policy using Add-ASWDACSupplementalPolicy, Azure Local uses these fields to determine whether the policy is new or a replacement of an existing one.
If you keep the same PolicyID but increment the version, the existing policy is replaced cleanly. If you accidentally create a new PolicyID, you end up with duplicate or orphaned policies on the nodes — which gets messy to clean up.
The safe practice is:
- Keep
PolicyNameandPolicyIDstable across updates. - Always increment
PolicyVersionwhen redeploying.
When to update a supplemental policy
You need to update a supplemental policy when:
- The software it covers has been updated and contains new or changed binaries.
- The software has been moved to a different installation folder.
- The vendor has released a new version of their own supplemental policy XML.
- You are adding additional applications to an existing supplemental policy scope.
Check what policies are currently active
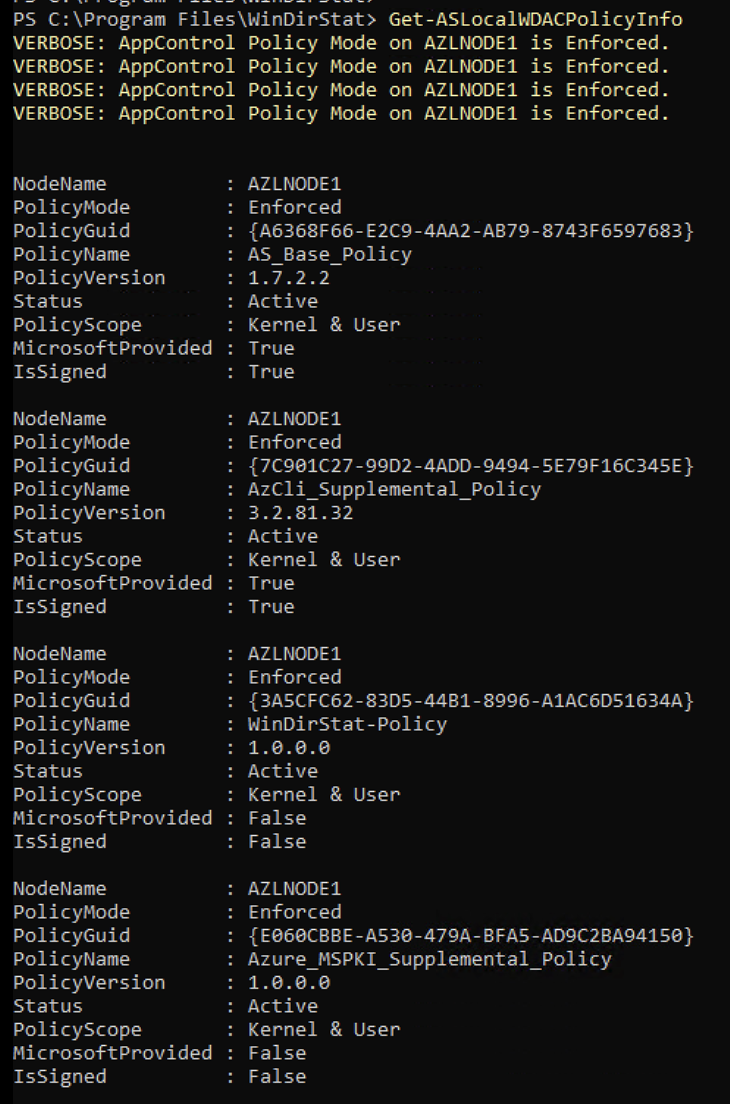
Before making changes, confirm what is currently deployed:
Get-ASLocalWDACPolicyInfoNote the PolicyName, PolicyGuid, PolicyVersion, and LastTimeApplied for the policy you are about to update.
Switch to audit mode
To avoid blocking the updated software during the transition, switch WDAC to audit mode first:
Enable-AsWdacPolicy -Mode Audit
HINT The mode change is orchestrated cluster-wide and can take a couple of minutes.
Update or reinstall the software
If the update involves installing a new version of the software, do that now while WDAC is in audit mode. This ensures the updated binaries are in place before you rescan and rebuild the policy.
Keep a version history
Before rebuilding the policy, archive the current XML so you can roll back quickly if something goes wrong:
$policyPath = "C:\wdac\WinDirStat-policy.xml"
$archive    = "C:\wdac\WinDirStat-policy-1.0.0.0.xml"

Copy-Item $policyPath $archive -Force
A simple naming convention like PolicyName-Version.xml in the C:\wdac\ folder gives you a clear rollback path without any extra tooling.
Rebuild the supplemental policy from the updated software
Re-run New-CIPolicy against the same scan path to capture the updated binaries:
New-CIPolicy `
  -MultiplePolicyFormat `
  -Level Publisher `
  -FilePath C:\wdac\WinDirStat-policy.xml `
  -UserPEs `
  -Fallback Hash `
  -ScanPath "C:\Program Files\WinDirStat\"
This overwrites the existing XML with fresh rules based on the current files on disk.
Increment the version and keep the same PolicyID
This is the critical step — increment the version but reuse the existing PolicyID so the deployment replaces the old policy cleanly:
$policyPath    = "C:\wdac\WinDirStat-policy.xml"
$policyVersion = "1.0.0.1"   # Increment from previous version

Set-CIPolicyVersion -FilePath $policyPath -Version $policyVersion
Set-CIPolicyIdInfo -FilePath $policyPath -PolicyID "WinDirStat-Policy" -PolicyName "WinDirStat-Policy"
HINT
PolicyIDis a stable identifier for the policy — never embed a version number in it. UseSet-CIPolicyVersionexclusively for version tracking. Azure Local uses thePolicyIDto find and replace the existing policy on each node.
Redeploy the updated policy
Deploy the updated policy across all cluster nodes:
Add-ASWDACSupplementalPolicy -Path C:\wdac\WinDirStat-policy.xml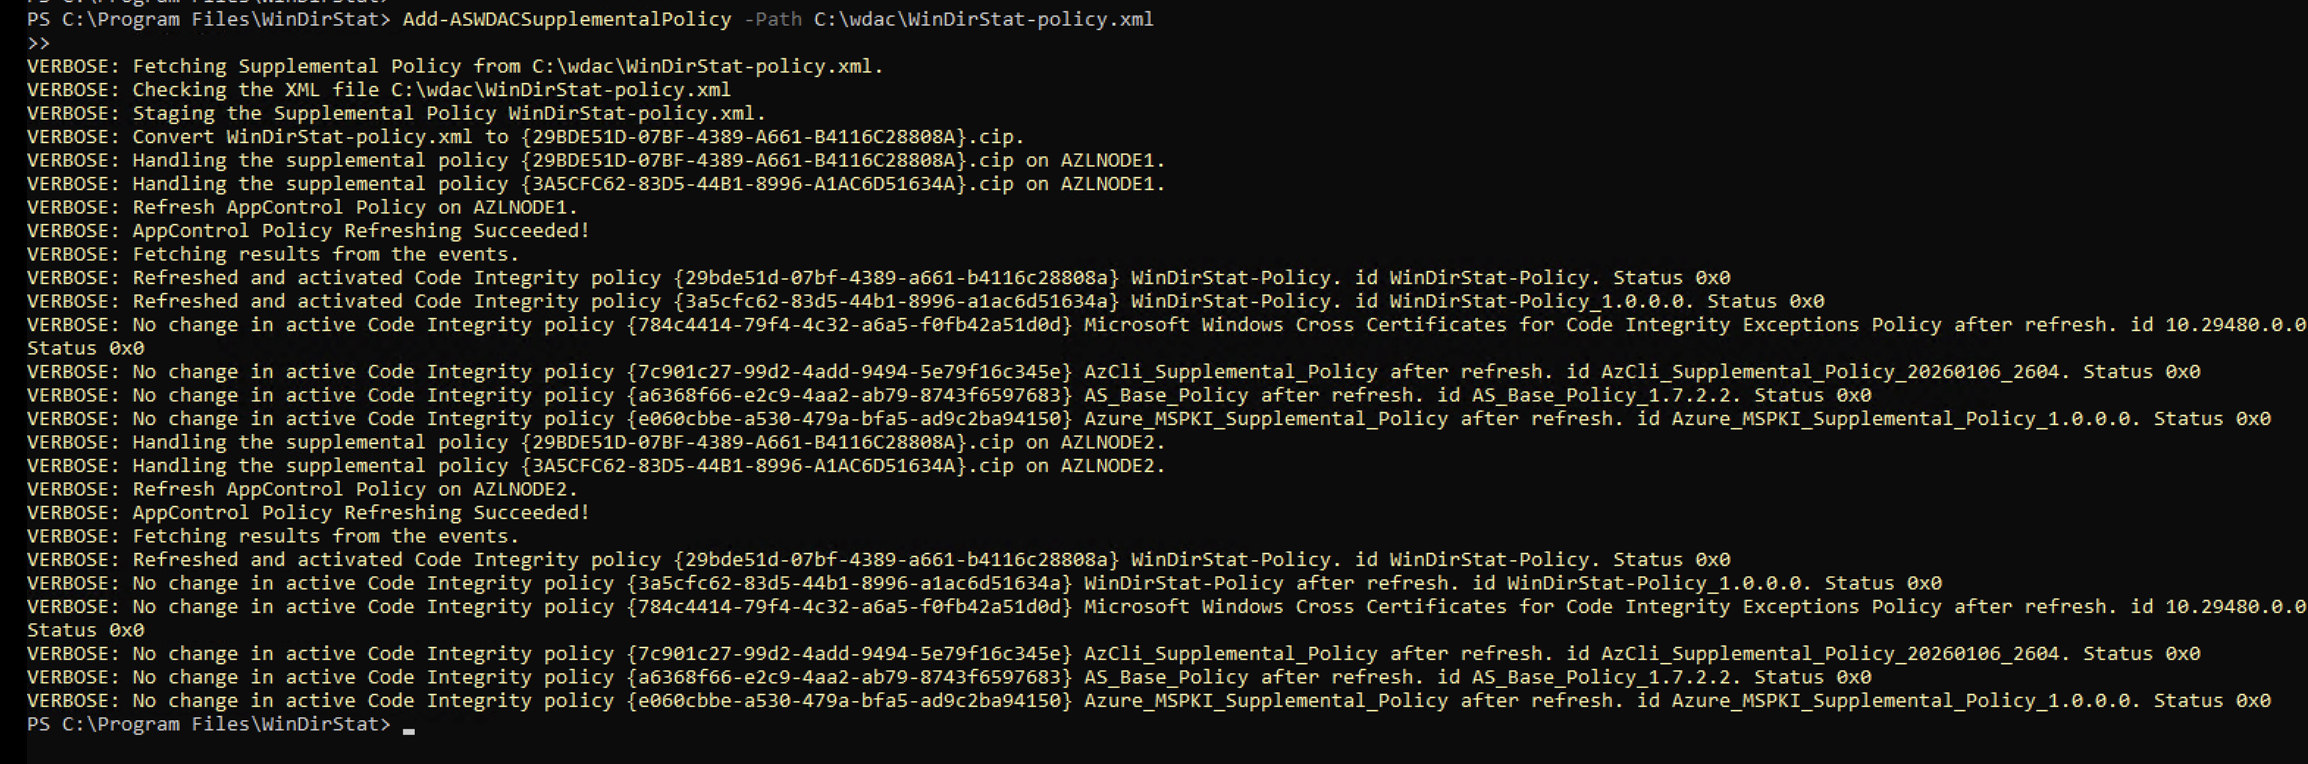
Then verify the updated version is now active on all nodes:
Get-ASLocalWDACPolicyInfo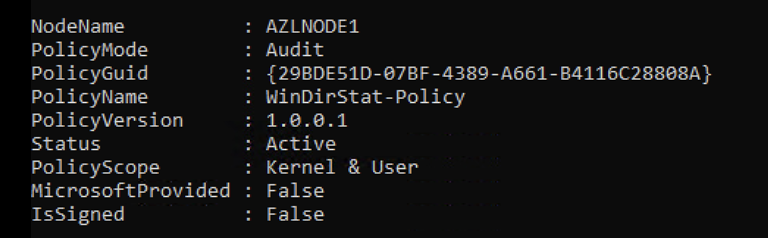
Confirm that PolicyVersion now shows the new version number and LastTimeApplied has been updated.
Return to enforced mode and validate
Switch WDAC back to enforced mode:
Enable-AsWdacPolicy -Mode Enforced
Run the software on each node to confirm it starts without issues after the policy update.
Final remark
Versioning discipline is the difference between a manageable WDAC policy lifecycle and an uncontrolled set of orphaned policies accumulating on your nodes. Keep the PolicyID stable, increment the version on every change, and archive the previous XML before overwriting. Together with audit mode during transitions, this approach keeps the cluster protected and gives you a clear rollback option if a software update causes unexpected issues.
Have feedback on this post?
Send me a message and I'll get back to you.