Azure Local - Kubernetes - Part 1 - Deploy Kubernetes cluster on Azure Local
- Intro
- Prerequisites
- Step 1 — Basics
- Step 2 — Node pools
- Step 3 — Access
- Step 4 — Networking
- Step 5 — Integration
- Step 6 — Review and create
- Post-deployment — MetalLB for LoadBalancer services
Intro
This article is part of a series: Navigate to series page
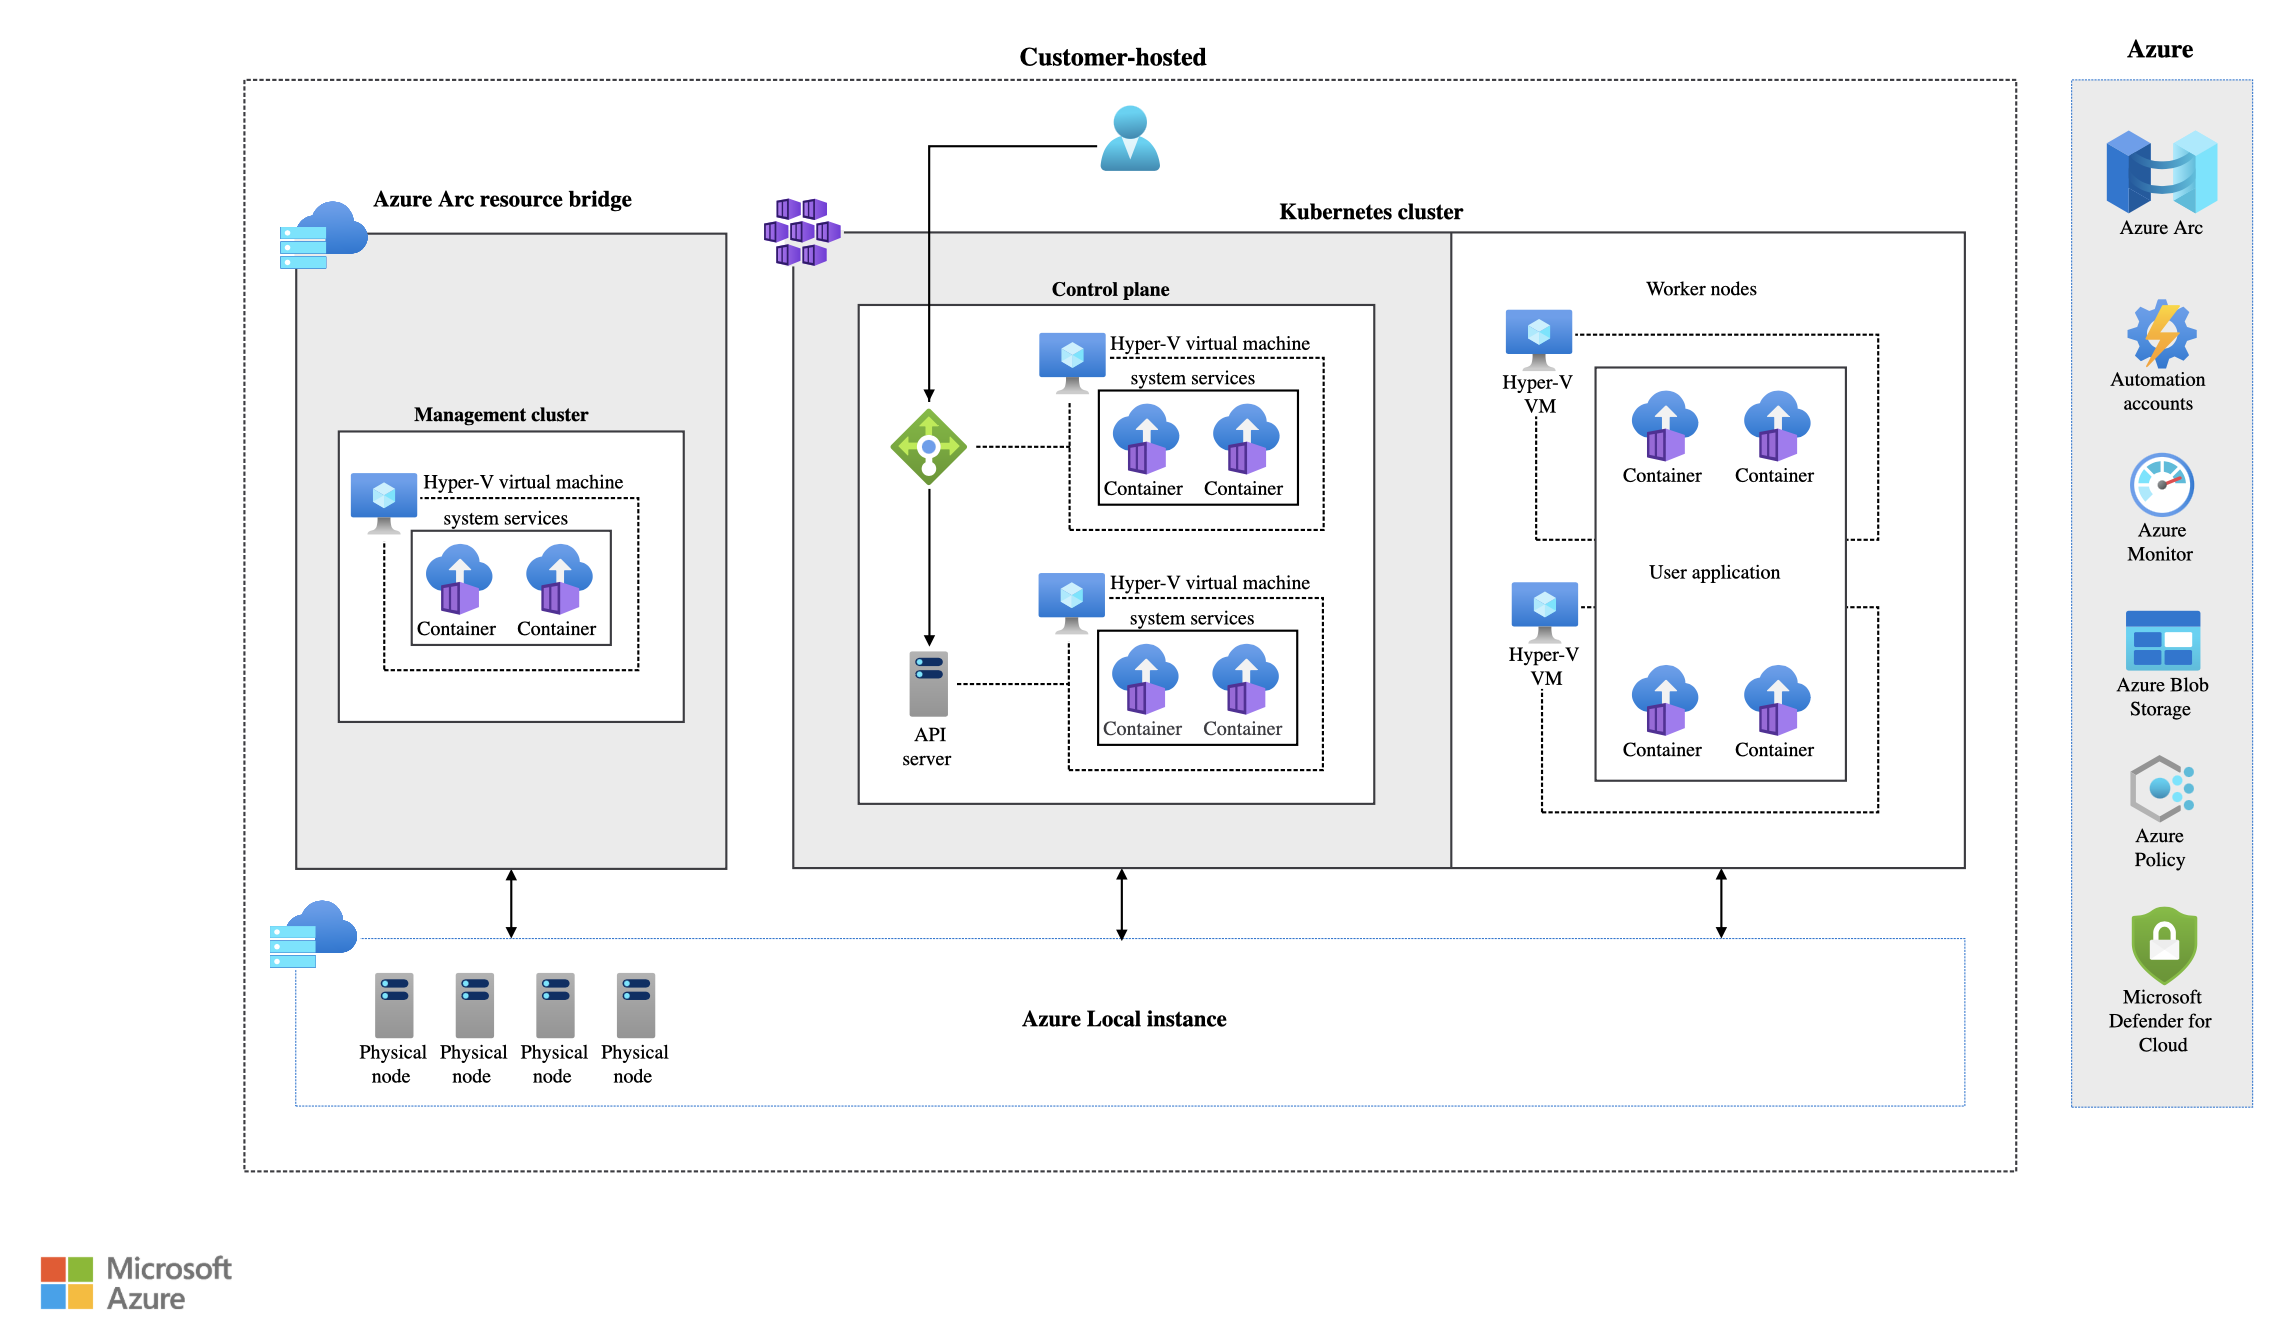
Deploying Kubernetes on Azure Local gives you a fully managed AKS experience running on your own hardware. The cluster is Arc-enabled automatically, meaning you can manage it from the Azure Portal just like any other AKS cluster — deploy workloads, configure networking, set up GitOps, and monitor health.
In this article I will walk through the full deployment of a Kubernetes cluster on my Azure Local homelab using the Azure Portal. I chose a minimal setup with 1 control plane node and 1 worker node, both using Standard_A4_v2 (4 vCPUs, 8 GiB RAM). This is suitable for testing and learning, but for production you would scale up the node sizes and counts.
Prerequisites
Before deploying a Kubernetes cluster, make sure the following is in place on your Azure Local cluster:
- Azure Local cluster is deployed and healthy
- A logical network is configured with available IP addresses for the Kubernetes VMs. In my environment this is
vlan0with the range 192.168.0.0–192.168.0.127 - A control plane IP address is available — this must be outside the logical network IP pool range, since it is a virtual IP (VIP) that does not consume a VM NIC. In my case I chose
192.168.0.49
HINT The control plane IP is a VIP for the kube-apiserver load balancer. It must be routable on the same subnet as the logical network, but placed outside the IP pool that Azure Local uses for assigning VM NICs.
Step 1 — Basics
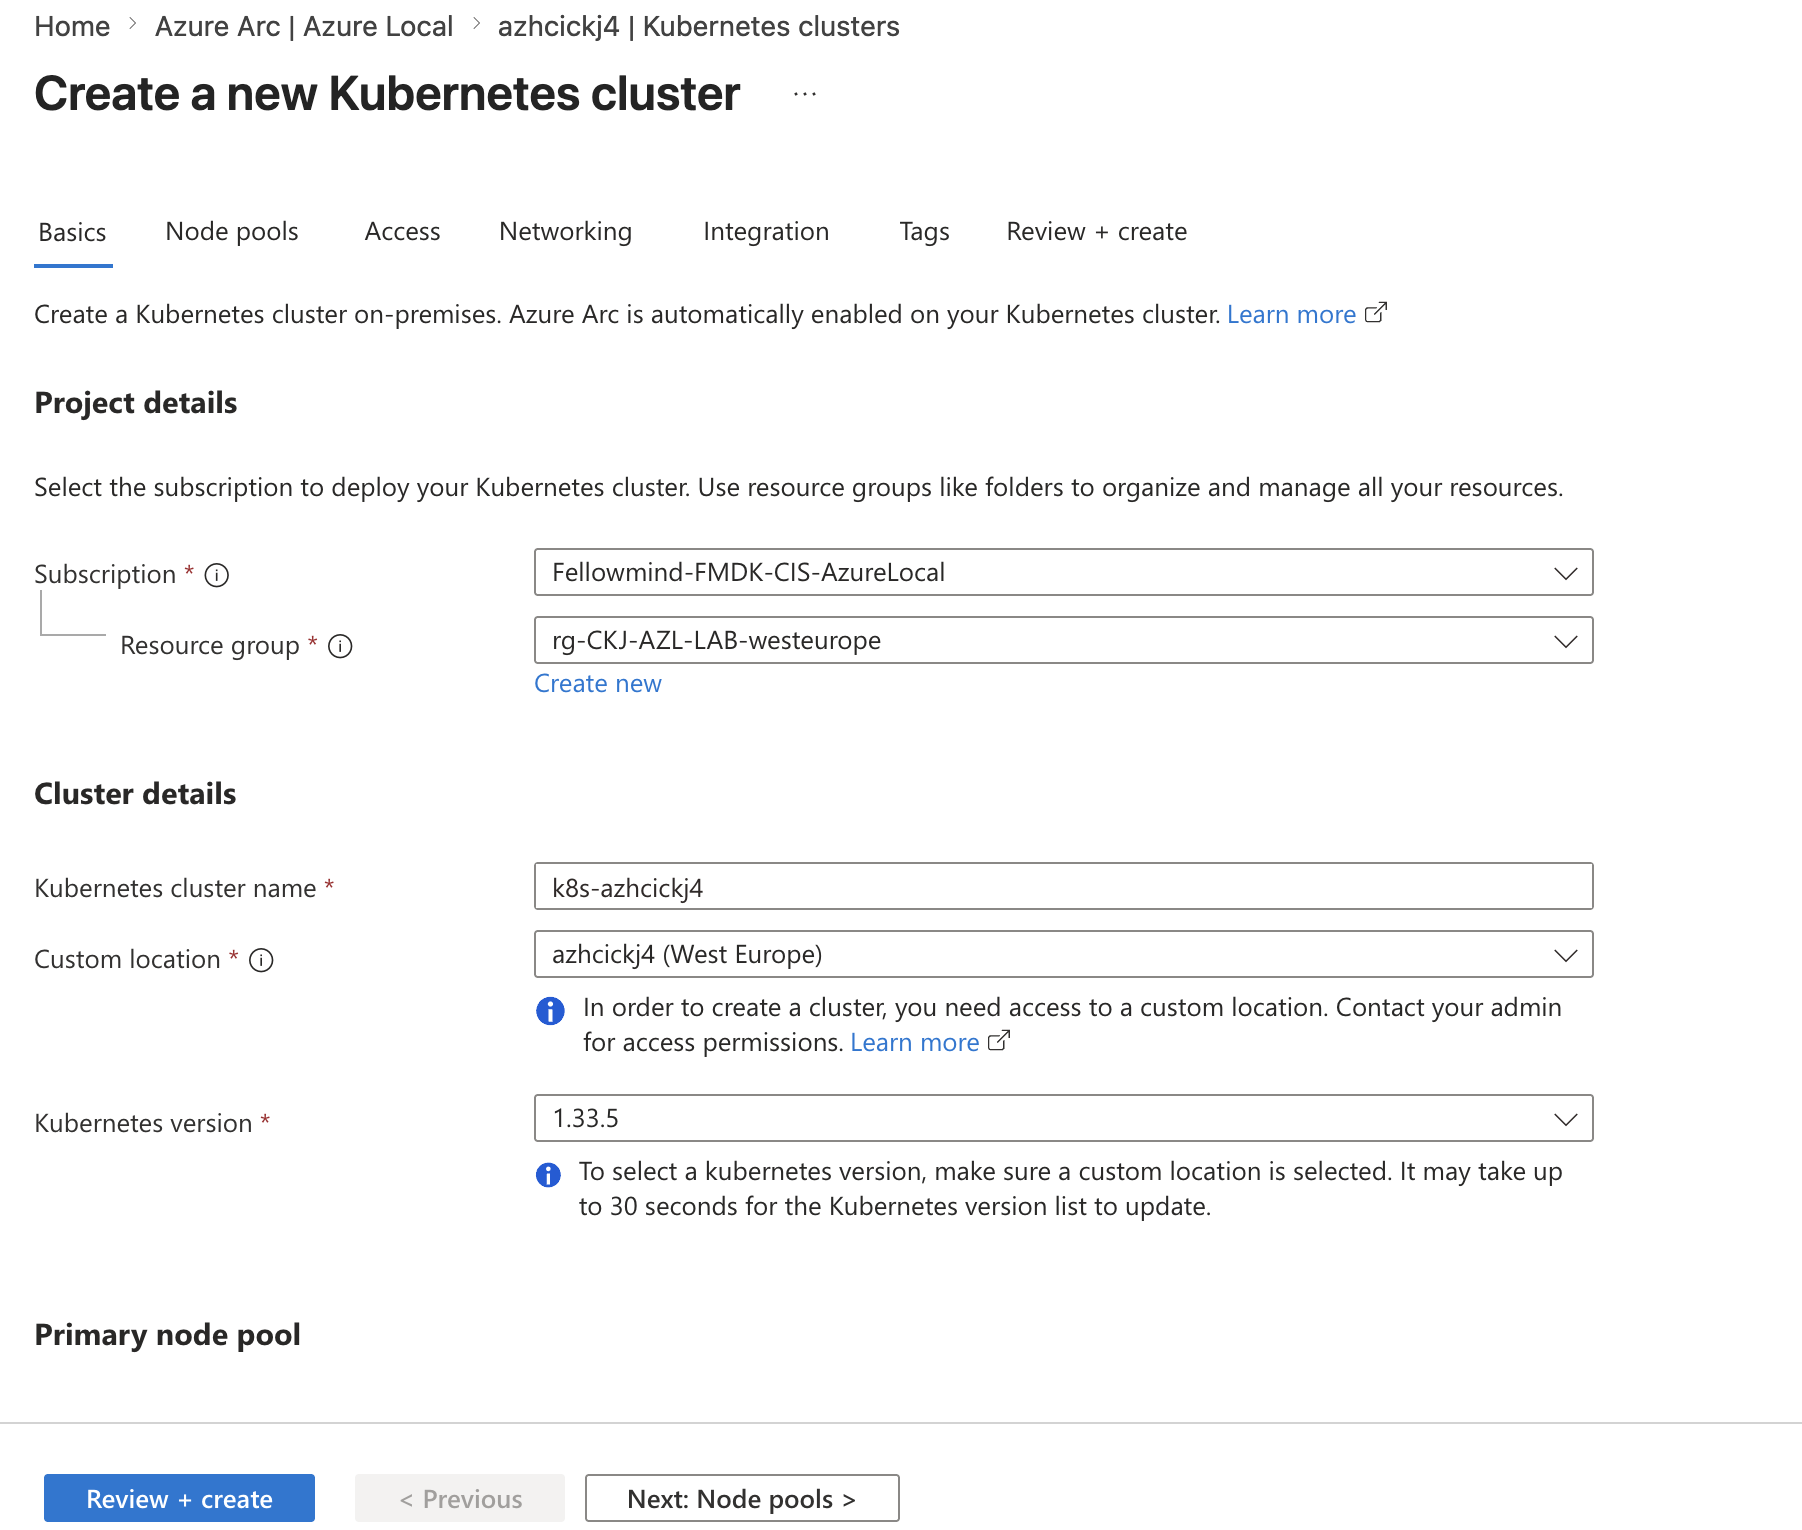
Navigate to your Azure Local cluster in the Azure Portal, go to Kubernetes clusters, and click Create a new Kubernetes cluster.
On the Basics tab, configure:
- Subscription: Select your subscription
- Resource group: Use the same resource group as your Azure Local cluster
- Kubernetes cluster name: I used
k8s-azhcickj4 - Custom location: Select your Azure Local custom location
- Kubernetes version: I selected
1.33.5(the latest available at the time)
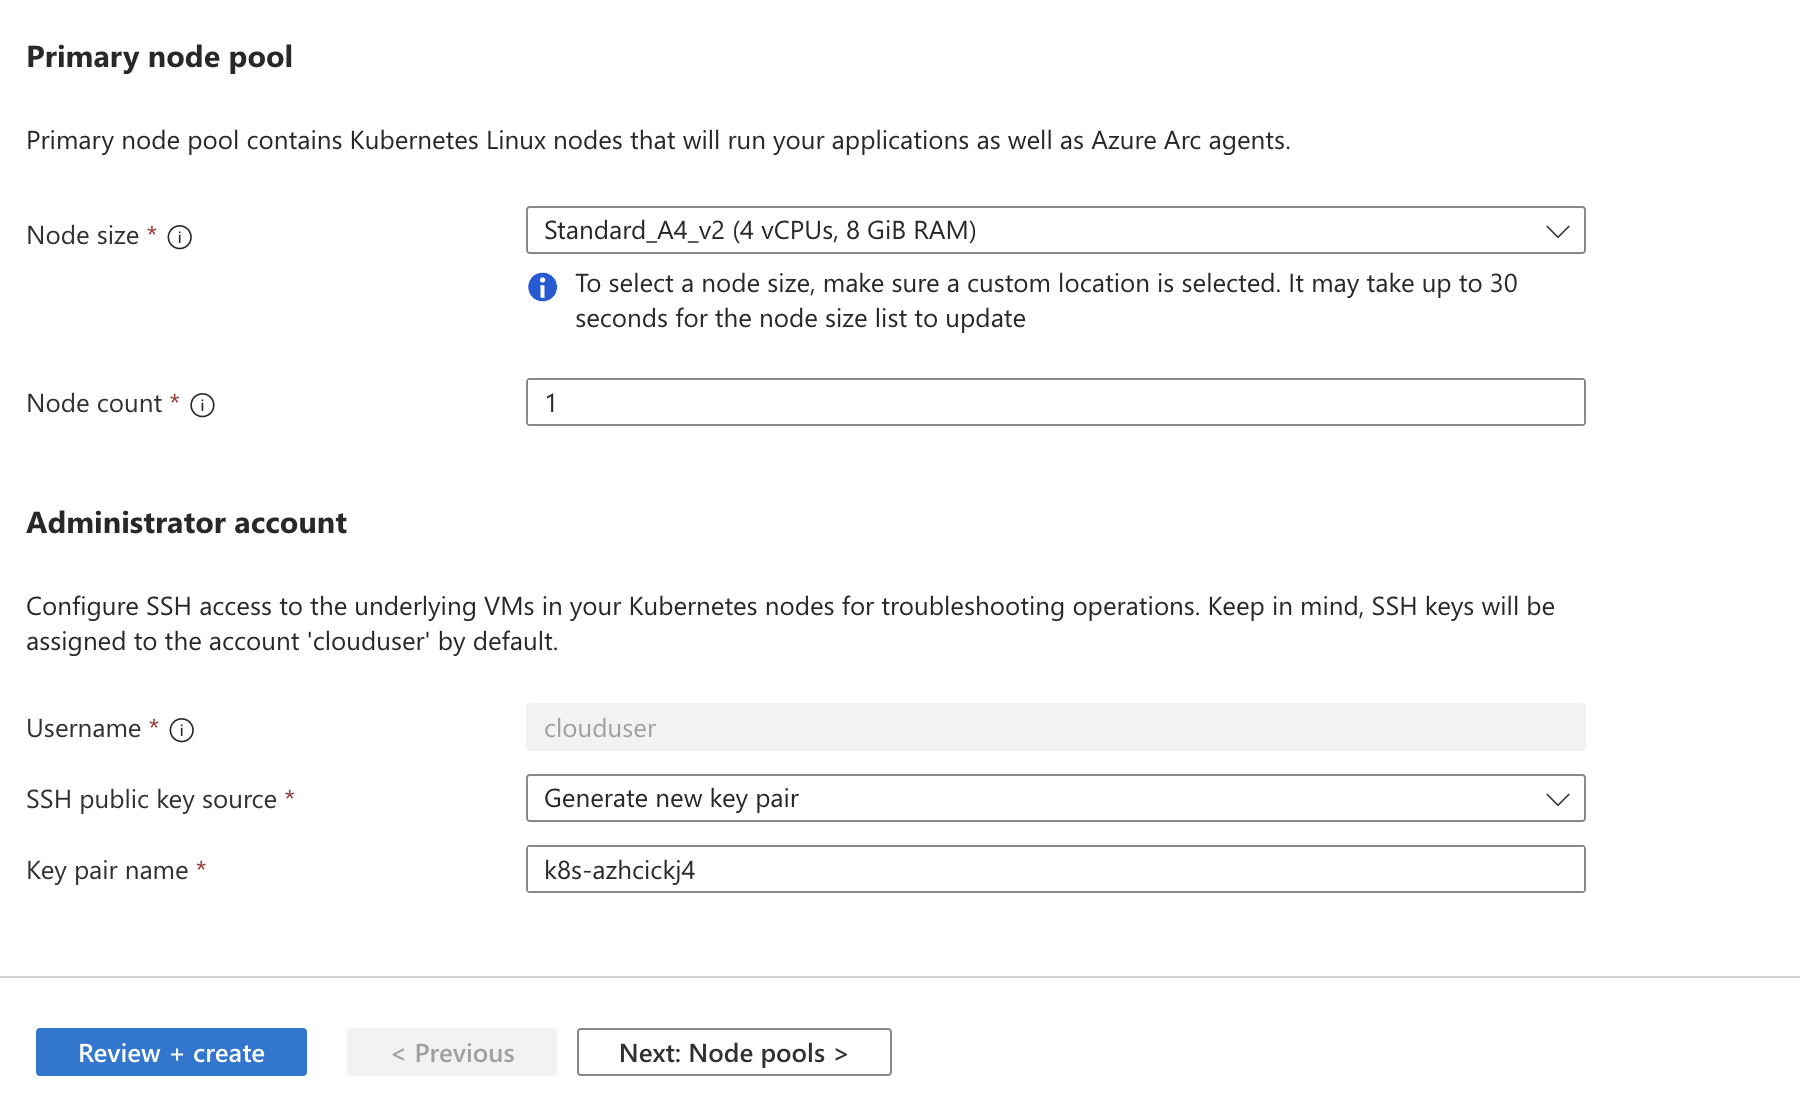
Under Primary node pool:
- Node size:
Standard_A4_v2(4 vCPUs, 8 GiB RAM) - Node count:
1
Under Administrator account:
- SSH public key source: Generate new key pair
- Key pair name:
k8s-azhcickj4
The SSH key gives you access to the underlying Linux VMs if you need to troubleshoot. Make sure to download and store the private key securely when prompted.
Step 2 — Node pools
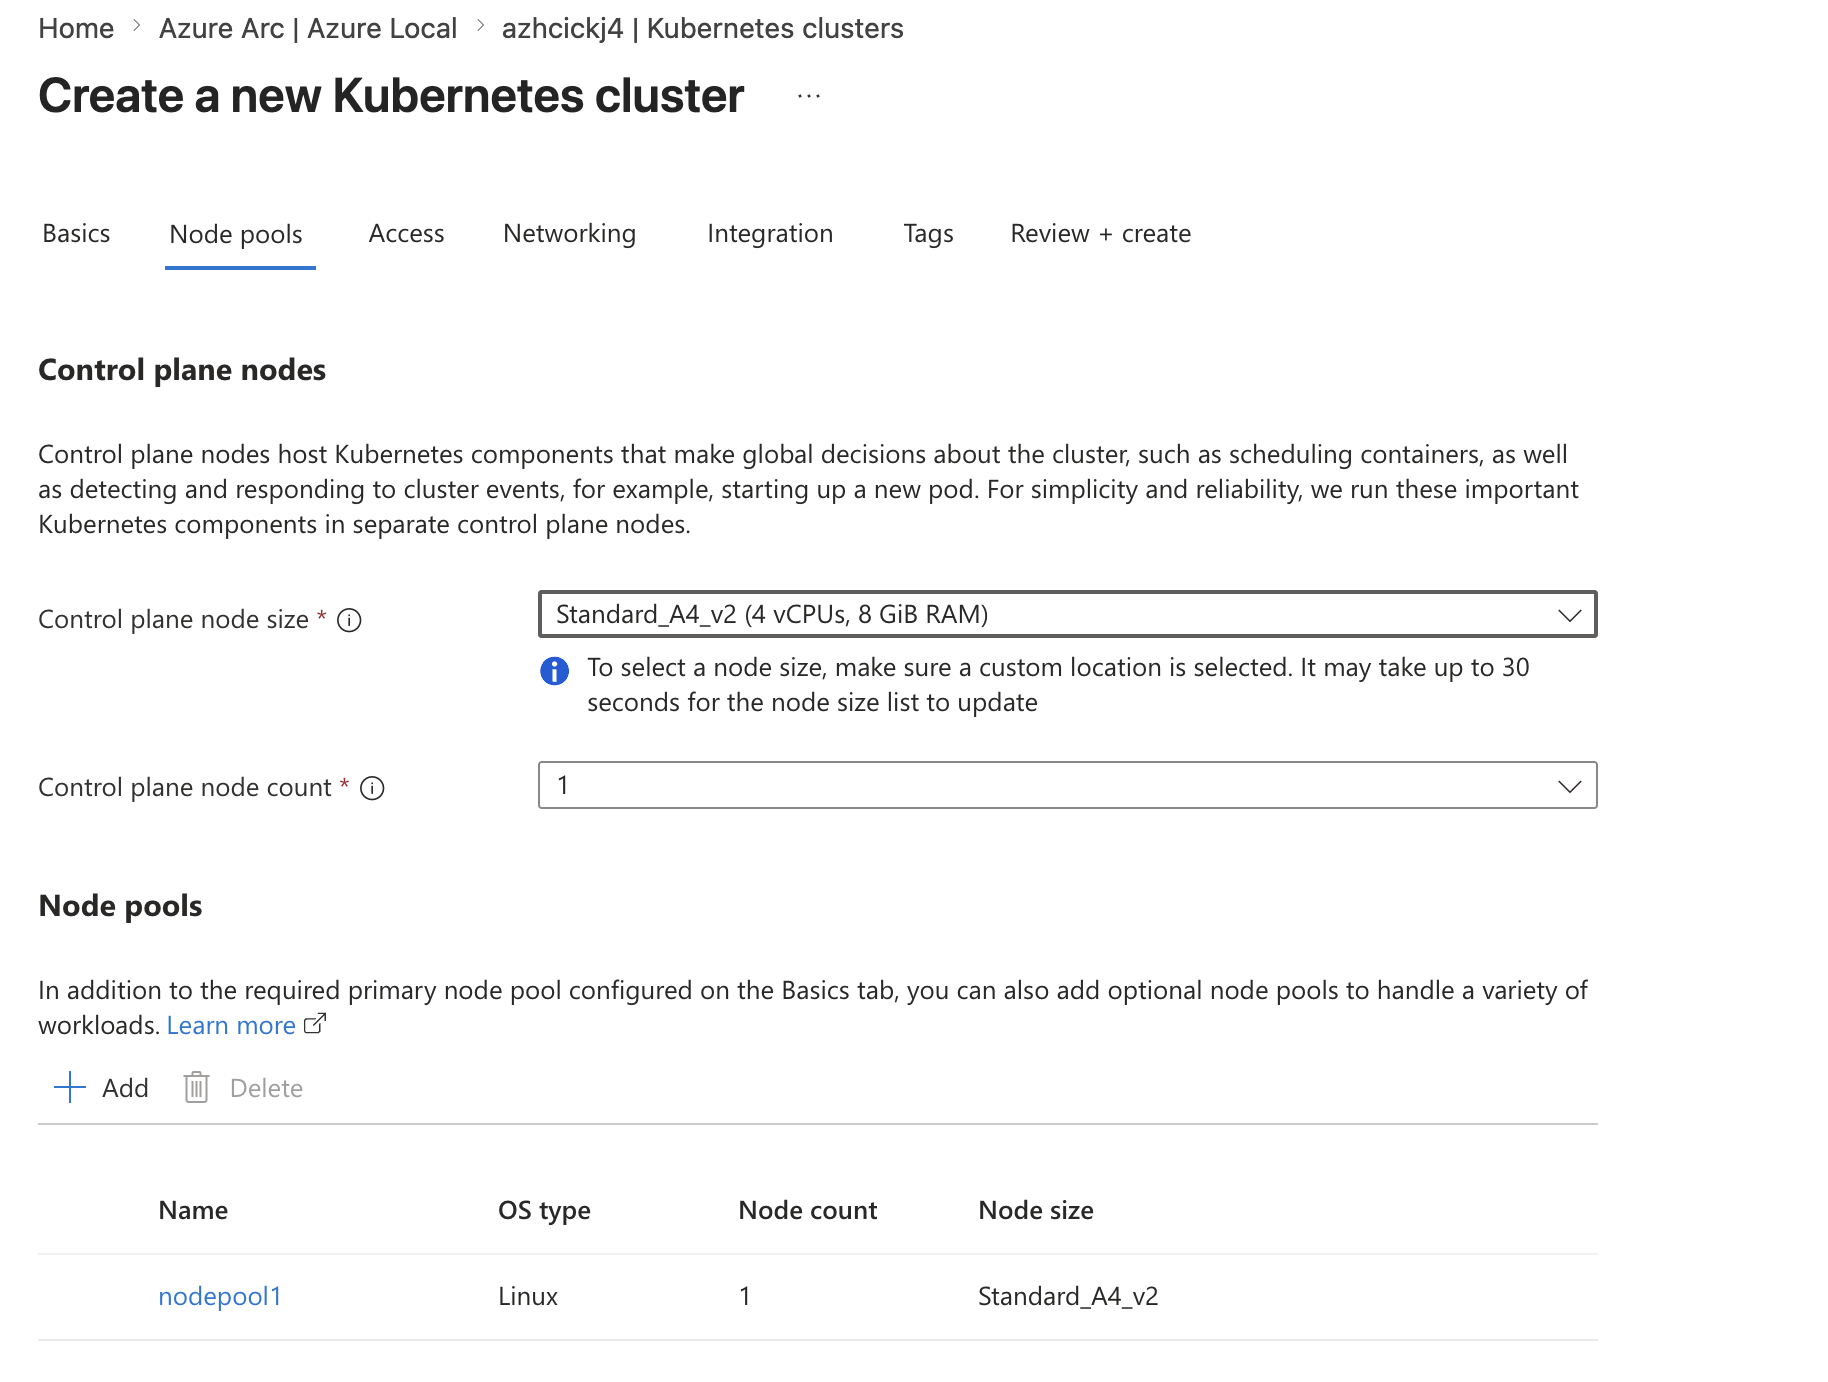
On the Node pools tab, configure the control plane:
- Control plane node size:
Standard_A4_v2(4 vCPUs, 8 GiB RAM) - Control plane node count:
1
The primary node pool configured on the Basics tab is also listed here. You can add additional node pools later if needed.
Step 3 — Access
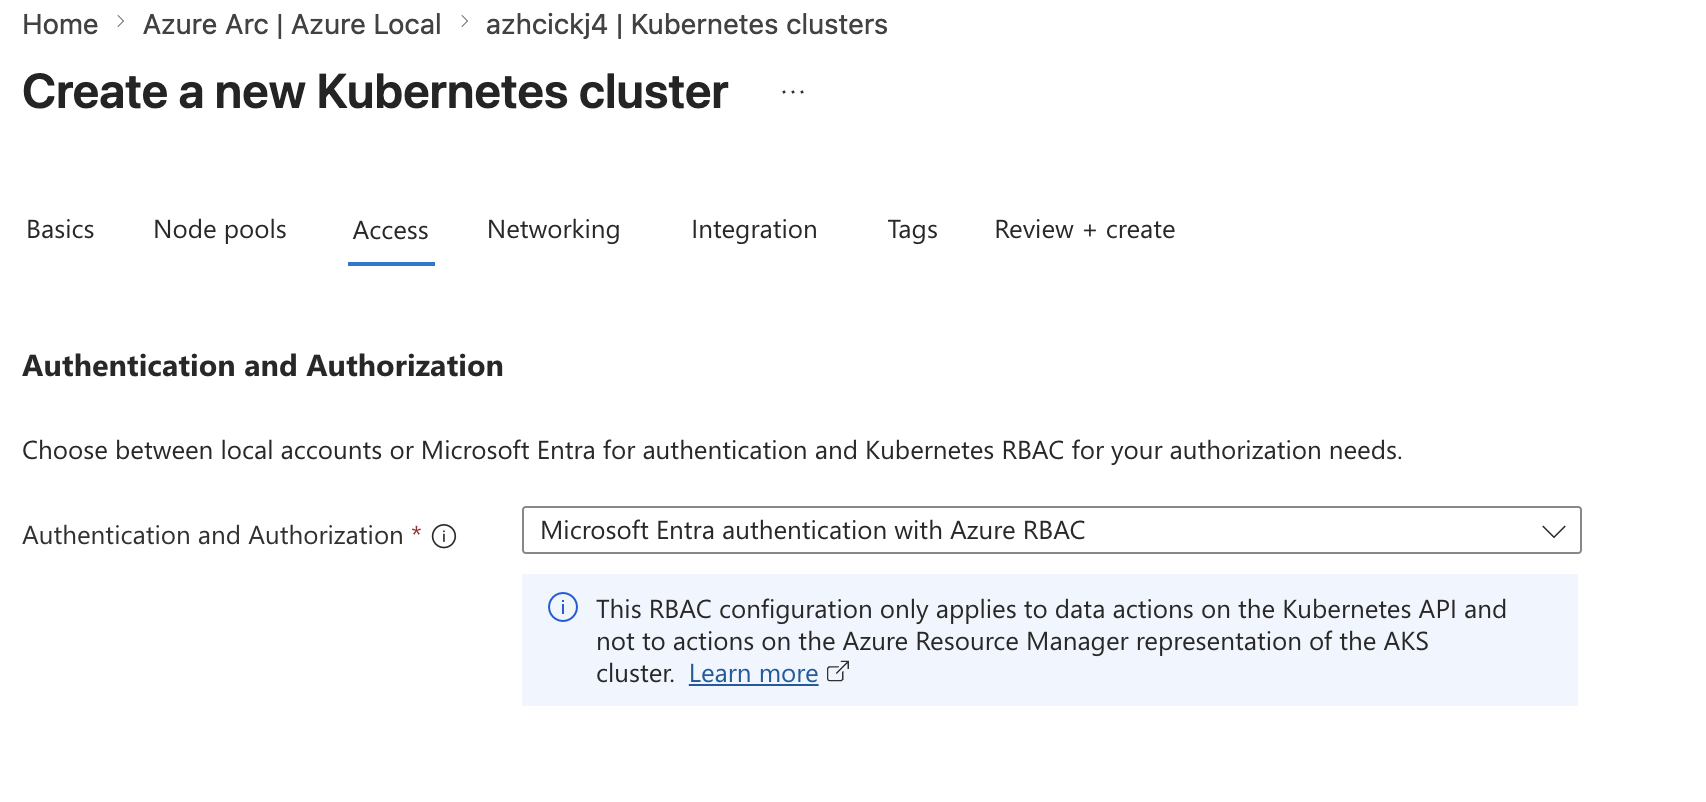
On the Access tab, select the authentication and authorisation method:
- Authentication and Authorization:
Microsoft Entra authentication with Azure RBAC
This means access to the Kubernetes API is controlled via Microsoft Entra ID and Azure RBAC roles. This is the recommended option as it avoids managing local Kubernetes accounts and integrates with your existing identity management.
HINT If you select Local accounts with Kubernetes RBAC instead, you will need to generate a service account bearer token to browse Namespaces and Workloads from the Azure Portal. I cover that process in Part 2 of this series.
Step 4 — Networking
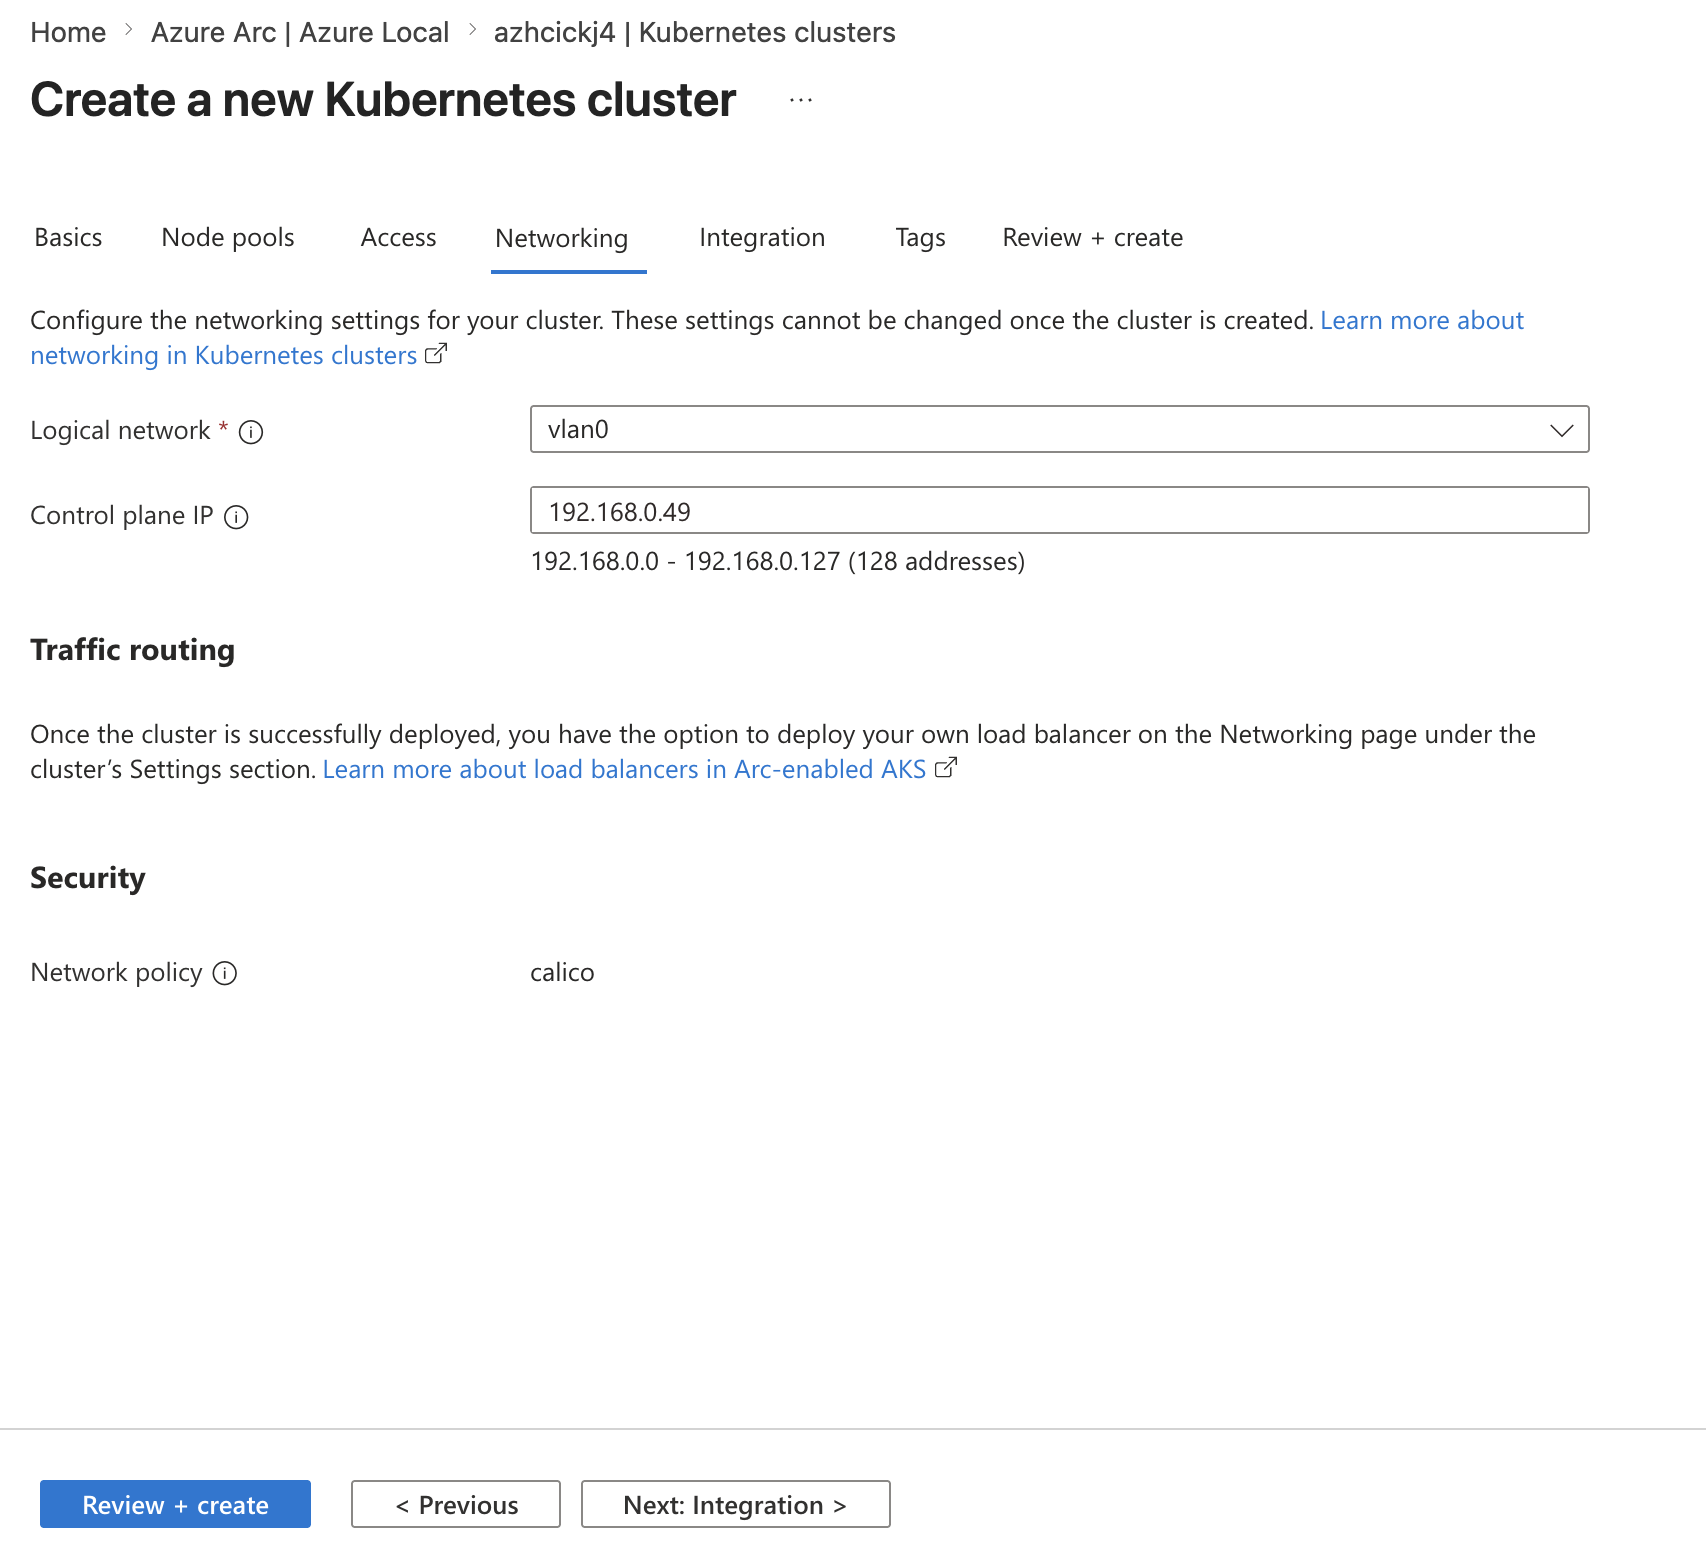
On the Networking tab, configure:
- Logical network: Select your logical network (I used
vlan0) - Control plane IP: Enter an IP outside the logical network pool range (I used
192.168.0.49) - Network policy:
calico(default)
Step 5 — Integration
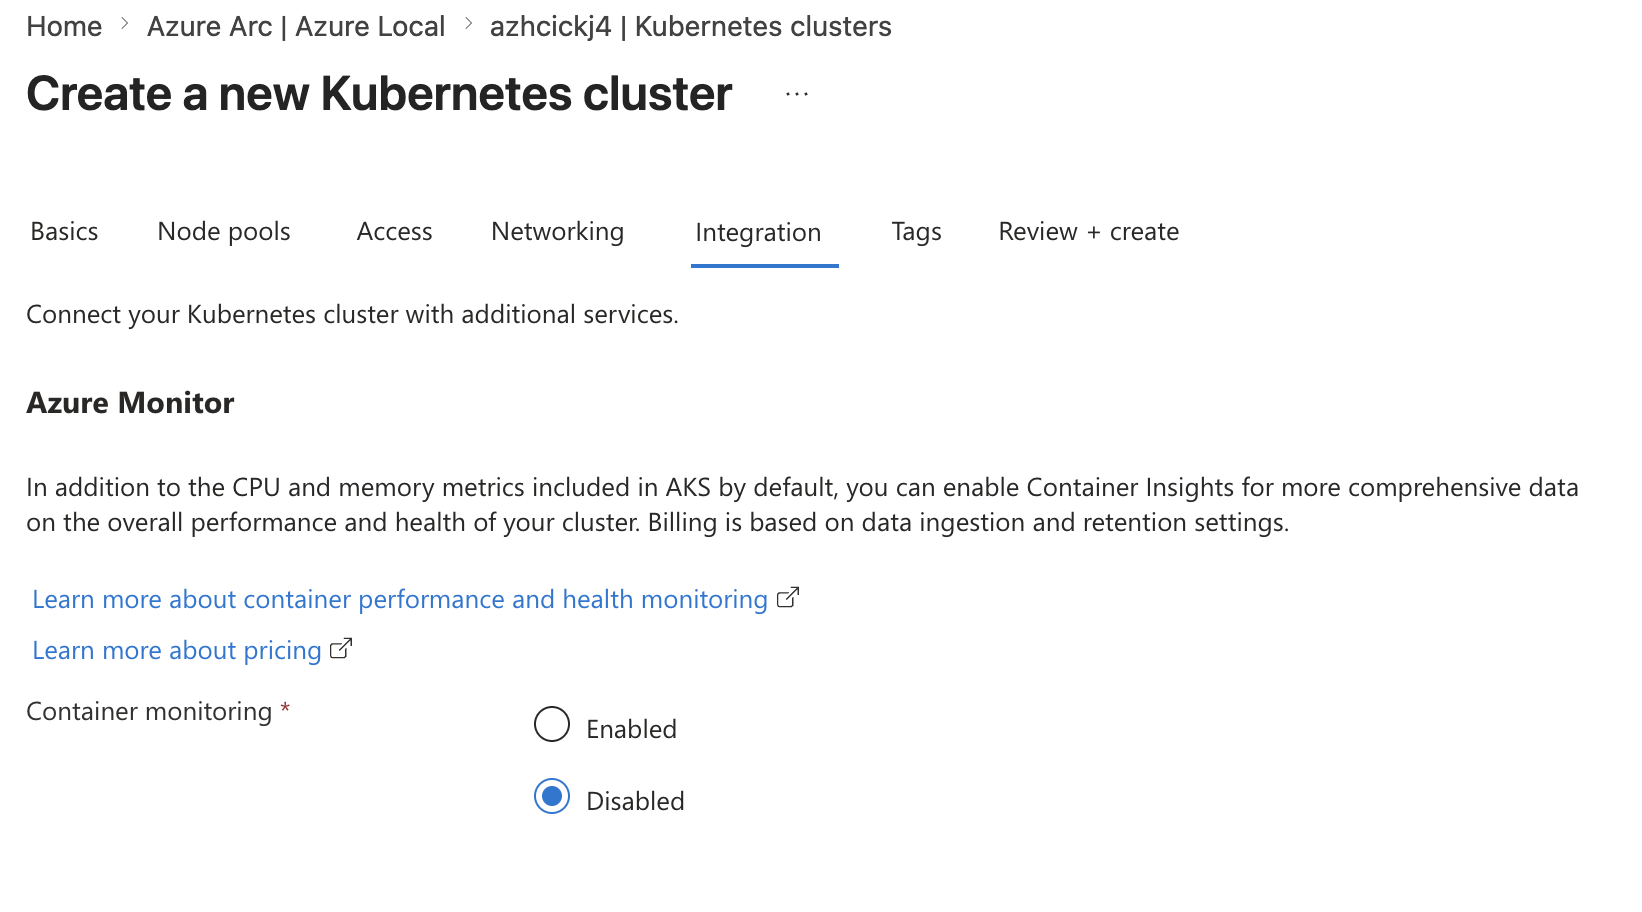
On the Integration tab, you can optionally enable Container Insights for monitoring. I disabled it for now since this is a lab environment and I want to control costs.
- Container monitoring:
Disabled
Step 6 — Review and create
Click Review + create and then Create to start the deployment. The deployment typically takes 15–30 minutes. Azure will create the control plane VM, the worker node VM, configure networking, and Arc-enable the cluster.
HINT During deployment, you may encounter a transient
APIServerNotOnlineerror if the ARB validates connectivity before the control plane VM is fully booted. If the cluster ends up in aFailedprovisioning state but is actually running, see Part 3 of this series for the fix.
Post-deployment — MetalLB for LoadBalancer services
Once the cluster is deployed, navigate to the Kubernetes cluster resource in the Azure Portal and go to Settings → Networking.
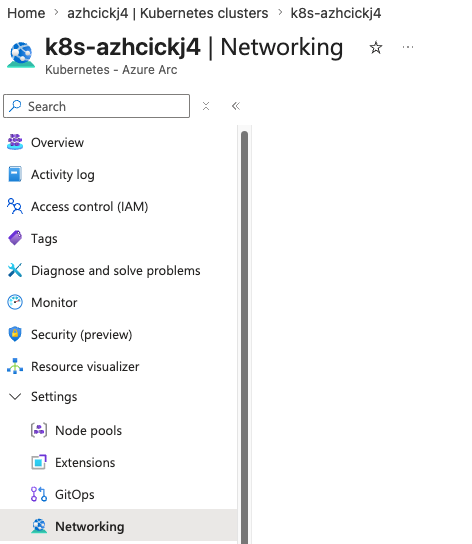
You will see a prompt to install the MetalLB extension for advertising external IPs of Kubernetes LoadBalancer services. Without MetalLB, any Service of type LoadBalancer will remain in a Pending state.
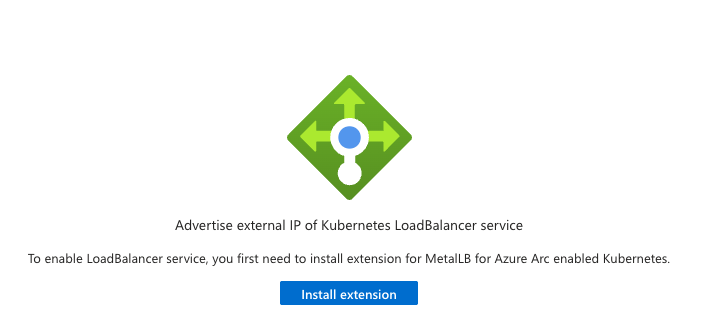
Click Install extension to deploy MetalLB. After installation, you can configure IP address pools that MetalLB will use to assign external IPs to your services.
Have feedback on this post?
Send me a message and I'll get back to you.