Azure Local - How to extend storage space and volumes in Azure Local stack
- Intro
- Add physical disks
- Add disks to Storage Space
- Validate you have free space in your storage pool
- Extend virtual disk and partitions
Intro
In this article I want to show how you can extend your storage capacity in your Azure Local stack. If you run a lab setup (nested virtualization), this article is also useful, since the process is the same.
Add physical disks
Before extending your storage pool, you need to make additional capacity available to the system. In a production environment, this typically means attaching new physical disks to the nodes. In a lab or test setup, you can instead add virtual disks through your hypervisor.
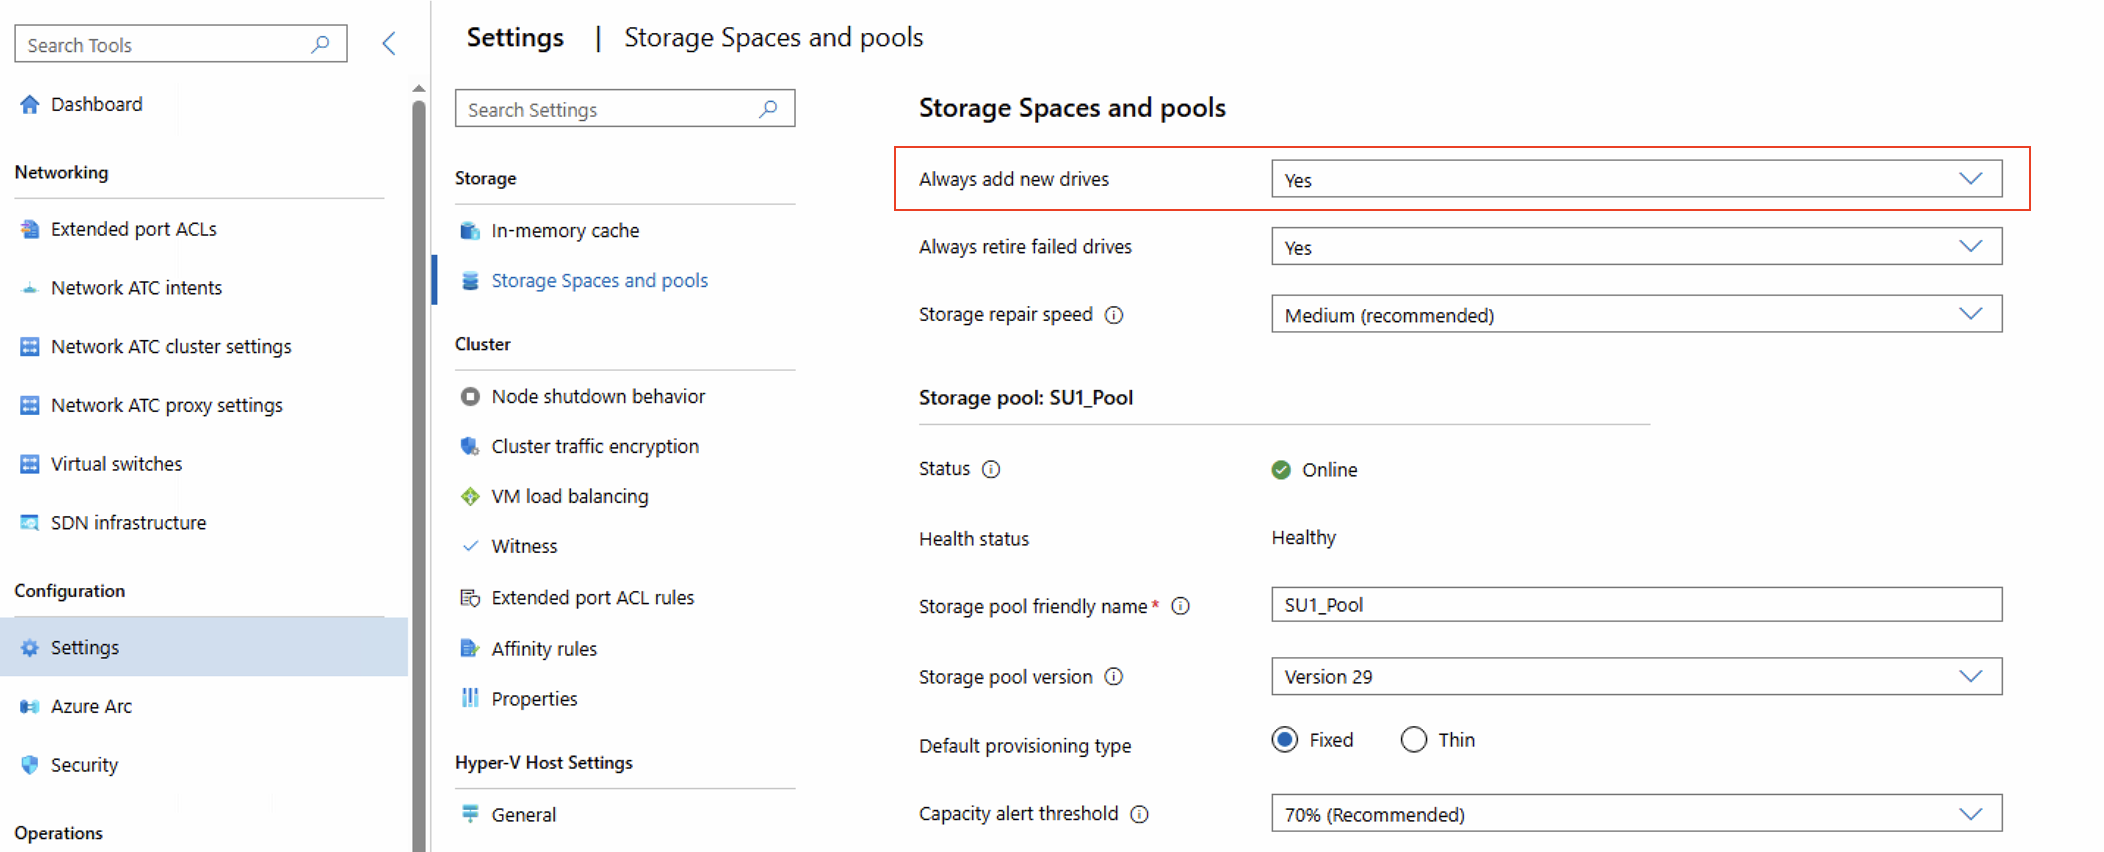
Be aware that in Azure Local, default settings for adding new disks to Storage Pool is set to true. That means that you do not have to perform the step described later: Add disks to Storage Space
Physical environment
Add new physical disk to each node in your stack. You must always add disks to all nodes in your stack. Every node in your stack must have the exact same number of disks with same physical size.
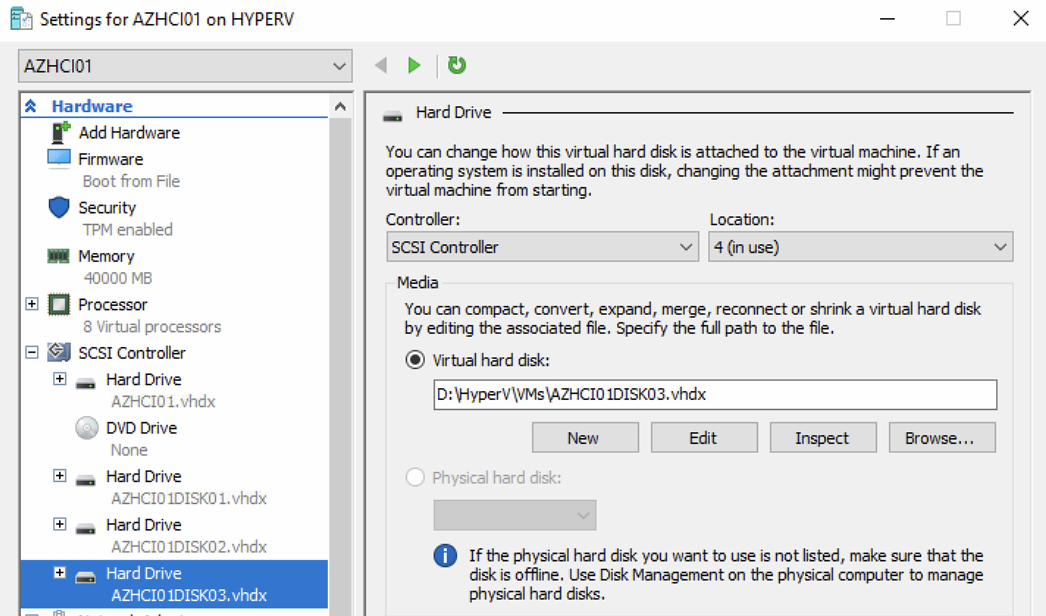
Lab mode - virtual environment
In your physical hypervisor running your virtualized Azure Local nodes, add a new disk to each node in your stack:
Add disks to Storage Space
(Only if your stack storage pool auto add disk settings is disabled, perform this step)
$disks = Get-PhysicalDisk -CanPool $true
Add-PhysicalDisk -StoragePoolFriendlyName "SU1_Pool" -PhysicalDisks $disks
Validate you have free space in your storage pool
Use this PowerShell command to verify that you have free space in your storage pool. We use the -IsPrimordial $false, to hide system pools.
Get-StoragePool -IsPrimordial $false
Extend virtual disk and partitions
In my setup, I have 2 nodes and 2 volumes. I want to extend size on both volumes to have equal capacity in each volume.
First I need to get the names of the virtual disks. Next, I extend the virtual disks. But before increased capacity is available for usage, I also need to extend the data partition within the volumes.
Below are the complete set of PowerShell commands to use for this operation:
# Show virtual disk names
Get-VirtualDisk

# Perform the expansion
Resize-VirtualDisk -FriendlyName "UserStorage_1" -Size 256GB
Resize-VirtualDisk -FriendlyName "UserStorage_2" -Size 256GB

# show volumes with disk numbers
Get-Disk

# Extend volume (partition)
# HINT: Use Get-Partition if you would like to see the partition number for the disk you are expanding
Resize-Partition -DiskNumber 5 -PartitionNumber 2 -Size 255GB
Resize-Partition -DiskNumber 6 -PartitionNumber 2 -Size 255GB
Have feedback on this post?
Send me a message and I'll get back to you.